
Today I figured that I would share with you all how to make your own social media icons. You will need a background image, any one that you choose. For this tutorial, I simply searched for "free backgrounds" and found a couple of websites that allow you to save their backgrounds for your use. You could also use any picture that you've taken - be creative!
Also, I'm using PicMonkey - a free online photo editing site. While there is an optional upgrade for certain fonts and themes, all of the things I will be showing you can be used for free.
So here we go:
How to Make Your Own Custom Social Media Icons (with PicMonkey)
Step 1: Choose Your Photo
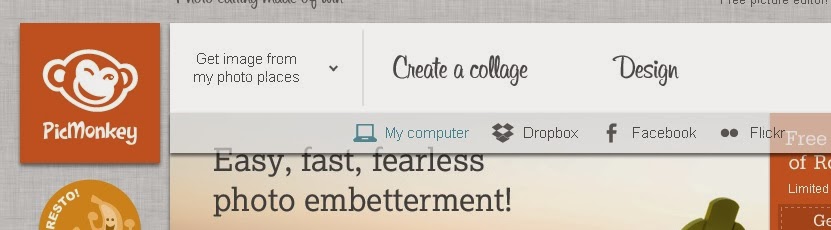
You should have your background image that you want to use saved to your computer. PicMonkey also allows you to take pictures from Facebook, Flickr, or Dropbox as well - just make sure you have a background picture that you want to be in your icons. Click on "Edit a Photo" and select the image that you want to use.
Step 2: Crop Your Image
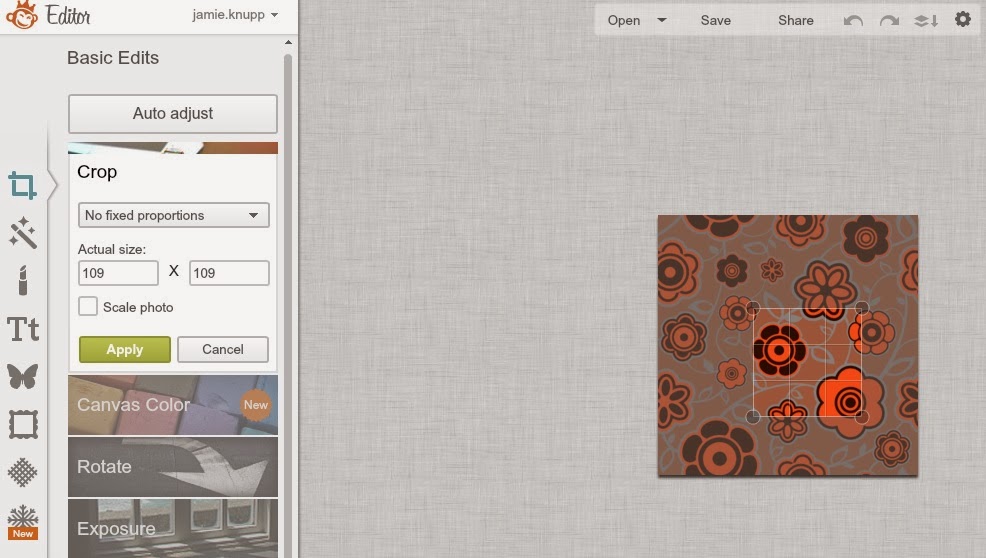
For this part, you want to find the part of your image that you want to be the background for your icons. If you want the entire image to be in your button, you can skip this step. Make sure when you're cropping that you keep a perfect square. This can be done by simply entering the numbers into the "Actual Size" boxes on the left. I try to stay around 100x100 but any size works for this part, as we will be resizing in a few moments.
Step 3: Turn the Square into a Circle
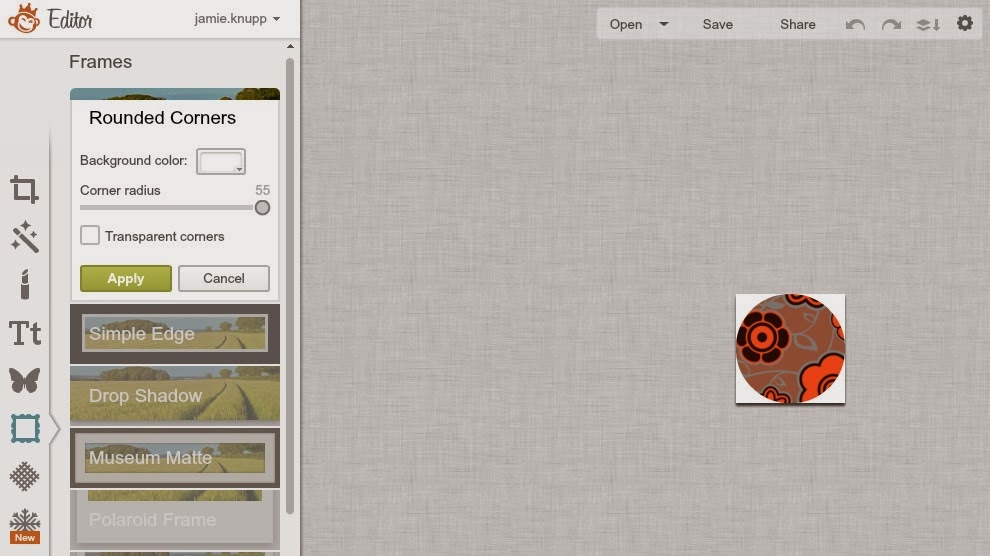
To make your buttons round, go to the frame button on the left menu, and select "Rounded Corners." By increasing the corner radius to the maximum level, you are left with a perfect circle. Click "Transparent corners" to get rid of the white background.
Step 4: Add Your Text
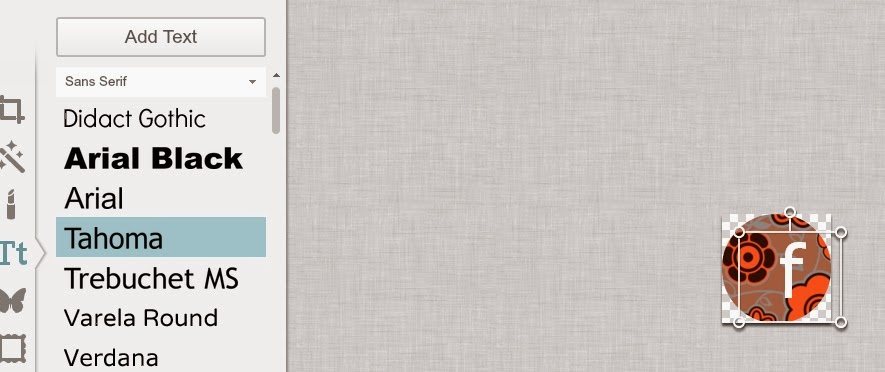
Click on the "Tt" button on the left menu and select the font you want to use. Press "Add Text" and then resize the font until it is big enough to see on your icon. Now, just add whatever text you want your button to say. For my Facebook button, I just added an "f" and changed the color to white. Here is where you can get creative - try all kinds of different fonts and colors until you come up with a combination that you love!
Step 5: Resize and Save
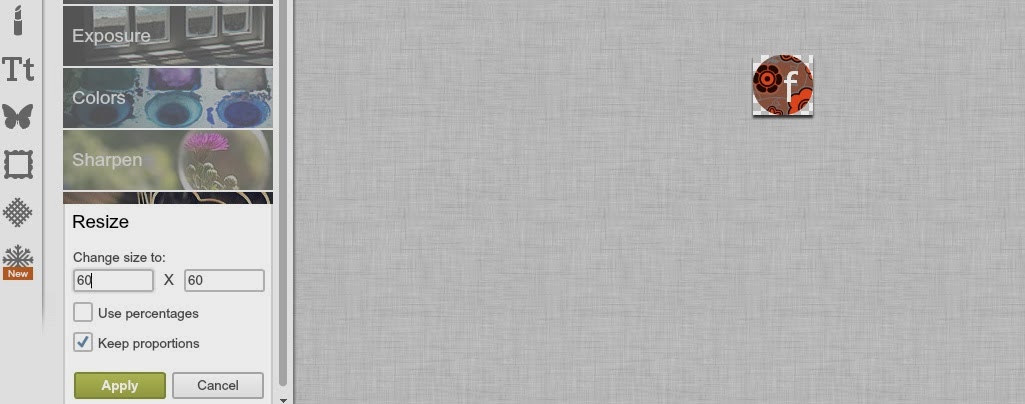
Click on the top button in the left hand menu and go down to "Resize." Depending on the size of your sidebar (or where ever you are wanting to add your social media icons) you will need to resize your button to fit. I usually go with a 40x40 because that gives me enough room to add all of mine in a row, but because I am only making this one button, I went with 60x60.
Now save, and you're done!
Here's my finished product:

Go ahead, click it! It will bring up my Facebook page - which you could "like" if you enjoyed this tutorial *hint hint* ;)
Disclaimer: According to Facebook copyright, as well as other social media outlets as well, you cannot "Modify Facebook brand assets in any way, such as by changing the design or color" - please keep this in mind, as changing the logo may place you in copyright infringement. This tutorial is only meant to teach you how to create your own icons, and is not meant as legal advice nor is it telling you that it is ok to change copyrighted images. This post lays the rules and guidelines out for what you can and cannot do with social media icons..
Disclaimer: According to Facebook copyright, as well as other social media outlets as well, you cannot "Modify Facebook brand assets in any way, such as by changing the design or color" - please keep this in mind, as changing the logo may place you in copyright infringement. This tutorial is only meant to teach you how to create your own icons, and is not meant as legal advice nor is it telling you that it is ok to change copyrighted images. This post lays the rules and guidelines out for what you can and cannot do with social media icons..


This is cool - thanks for this always wondered what that facebook font was :)
ReplyDeleteactually, the facebook font is a lower-case F in Corbel Bold - so another way to doing this would be to use an additional photo software like photoshop or paint.net and create a .png image with just the letter and add it in as an overlay - but that gets complicated lol. Thanks for checking my blog out!
DeleteThanks for sharing - appreciate it. I am always on the look out for new and easy ways to do things.
ReplyDeleteVery cool info, thank you. I'm always happy to learn of new e-tools that are available. I'm a former technical writer (now a teacher), and the cool graphic tools have come so far - oh, how I wish I'd had access to current technology back then - my bosses would've thought I was brilliant!
ReplyDeleteThanks for this! I have made mine like this too
ReplyDeleteI love these tutorials! They are going to help me quite a bit in the next few months!
ReplyDeleteErin K. (erinknack08@yahoo.com)
Thank You So Very Much This Is All New To Me I'm Lucky To Get My Social Icons On My Posts How Do You Place This Icon You Showed Us On A Particular Spot On Your Website Or Am I Pushing My Luck!! LOL! :)
ReplyDeleteThis is a great tutorial! I remember when I was scouring the internet for buttons, I never thought to make them myself!
ReplyDeleteyou should be careful editing social media icons, the images are copyrighted, and some etsy shops have gotten in trouble for editing them too much. each social media site has specific rules about how you can and cannot change their image, incluing font, backround, shape, etc. :(
ReplyDeleteThanks for reminding me - I forgot to add that disclaimer to the end of this post! While I use custom icons, I know that you are not supposed to "Modify Facebook brand assets in any way, such as by changing the design or color" as per the copyright. This tutorial is not meant to go against Facebook regulations - is is merely a tutorial for those who were wondering :)
DeleteThis is fantastic! I love finding ways to customize my blog and who doesn't love PicMonkey!! :)
ReplyDeleteGreat work and tips!
ReplyDelete