Showing posts with label Recipes. Show all posts

Stop and Eat the Roses: 5 Edible Flower Recipes That are Almost Too Pretty to Eat

Flowers for dessert? Yes, you can eat flowers! Read on to learn about five edible flower recipes that are almost too pretty to eat.

Are you joining the edible flower trend and want to try out some recipes?

Though we only use flowers as gifts or decoration, they're actually packed with nutrients.

You'll find vitamins C, D, A, and E, tons of antioxidants, beta-carotene, pollen, and dietary fiber. However, not all flowers are edible and some have a bitter taste. This is why you should learn which are the best ones to eat and use them sparingly in your meals.

I discovered edible petals and blossoms recently and enjoy making my meals pretty. Keep reading below to discover my favorite recipes and make your kitchen a spring garden of flavors!
1. Flower and Herb Infused Butter
Why settle for plain butter when you can infuse it with flowers and herbs bursting in flavor?
For this recipe, you'll need:

  • 1 package of unsalted grass-fed butter (room temperature)
  • Fresh herbs of choice
  • Sea salt
  • Fresh edible flower petals

Spread the butter over a pan lined with baking paper. Sprinkle the herbs, spices, and edible petals on top and transfer it into a container.

Visit your local flower shop to stock up on fresh edible flowers. Your florist can recommend the best kinds and give you tips on how to use them in edible flower recipes.
2. Lilac Flower Water
For this refreshing recipe, you'll need:

  • Two handfuls of fresh lilac blossoms (separated from the twig)
  • Purified water
  • Sweetener of choice
  • Lemon slices
  • Mint leaves

Put the lilac blossoms in a pitcher and fill it with water. Let the water infuse for a day and add the sweetener and lemon slices. Garnish with mint leaves and serve cold.
3. Luxurious Chocolate Bark With Rose Petals
For this luxurious sweet treat, you'll need:

  • 2 bags of chocolate chips
  • Edible rose petals
  • Optional: edible gold leaf, glitter or chocolate pearls
  • Food coloring (if using white chocolate)

Melt the chocolate in a bowl over a pot filled with water on low to medium heat. Remove the bowl, add the food coloring and stir well. Pour the chocolate over a baking tin lined with parchment paper to form a bark. Sprinkle the rose petals, gold leaves, and pearls on the top and put it in the fridge to harden.
4. Petal-Filled Breakfast Parfait
Breakfast is the most important meal of the day, so why not prepare a flower-loaded one to make your morning brighter?

For this recipe, you'll need:

  • 1 cup of fresh fruits cut into chunks
  • 1-2 cups non-fat or low-fat yogurt
  • 1 cup granola
  • Edible flowers

In a tall glass, add a layer of yogurt, then fruits, and granola. Keep going until the glass is full but leave some space to add the flowers on top. Optionally, you can add a layer of flowers on top of the yogurt instead of the fruits. Serve immediately.
5. Flower Popsicles
Popsicles are a kid's favorite, but adults love them too! For this refreshing edible flower dessert, you'll need:

  • Transparent or lightly colored fruit juice, coconut water, lemonade, tea or infused water
  • Edible flowers
  • Popsicle mold and sticks

Add a pinch of flowers to each mold and fill them halfway through. Add another pinch and fill them to the top. Stir gently using popsicle sticks. Cover the mold and put it in the freezer to set.
Try These Delicious Edible Flower Recipes Today!
Experiment in the kitchen with these incredible edible flower recipes that'll take your cooking skills to the next level.

For more yummy recipes and cooking tips for the entire family, explore my blog.

The Complete Guide to Smoke Sardines

Smoked sardines! They are incredibly tempting and amazing meal that one can prepare at home. Sardines are a great source of vitamin B12 and D and are high in protein. This fish is highly nutritious and is high in minerals like phosphorus, selenium, calcium, and potassium. One must add this fish to their diet. Its features do not end here as this fish contains a bundle of omega-3 fatty acids. Well, if you wish to eat smoke sardines, then you might be wondering how to smoke it? Here you will get to know the steps that will help you smoke sardines at your home.
Ingredients you will need to smoke sardines
Fresh sardines, peppercorns (2 tbsp), smashed cloves garlic (2 pcs), kosher salt and honey (1/4 cup), dried and crushed chilies (3 pcs), chopped parsley (1/2 cup), one grated onion, water (4 cups) and four bay leaves.  
Steps you need to follow
Following are the step by step guide to smoke sardines.
Step 1
The first step is to wash it and remove the ribs. After that, prepare the brine and put all ingredients in a pot and keep it over medium-high heat. Stir well, bring to boil and turn off the heat. Cover and leave at room temperature.
Step 2
Take a large non-reactive container and submerge the fish in it. Place it in the fridge and leave it to for about 12 hours. Do not leave it more than 12 hours otherwise it will become very salty. Now take them out and rinse under running water. Make sure to turn it in order to ensure equal drying.
Step 3
Once it turned dry, place it in an electric smoker. Well, you can browse Electricsmokercenter.Com to get electric smoker of your choice. So, now you have to cook sardines on low heat for about 4 to 5 hours. You can use any among the following woods- apple, almond, maple or hickory wood. Make sure not to use pine wood.

Step 4
Now you have to smoke the fish at 140 ° Fahrenheit of the internal temperature. Actually, it is essential to do so as the smoke will penetrate the fish due to which oil will not come out. Further, it will let the omega 3 fatty acids stay on the fish.
Step 5
You have to remove it from the smoker after 4 or 5 hours as they will get ready. After that, you have to allow them to cool at room temperature. Now what you have to do is to store them in an airtight plastic bag. Now place them in the refrigerator. By doing so, you will be able to keep the meet for up to 2-3 weeks. You can even place them in a vacuum sealed container so as to keep them for few months.

Well, it is good if our cut the heads and put the fish in a Tupperware and then pour in the oil. They will last for several months if they are completely submerged. So, now you have enough knowledge on how to smoke sardines. Just get the one and prepare it for your home.

Homemade Chicken Noodle Soup Recipe

With three germy little kids going to germy little schools with other germy little kids, the sniffles and sore throats are running rampant here at my house. Chicken Noodle Soup may not be a miracle cure for the common cold, but there's just something about the flavors and the nice warm soup that just seems to make you feel better after a bowlful. 


Usually, when I don't feel good, I'll just pop the lid to some canned chicken noodle soup and heat it up, but when it comes to my kids not feeling well, I try to make them something with a little more nutritional value and some love. This homemade chicken noodle soup has everything you could want in a soup - the hearty veggies, the delicious broth, the roasted chicken... It's the perfect go-to for a quick pot of feel-good yumminess.


Homemade Chicken Noodle Soup with Egg Noodles


Homemade Chicken Noodle Soup with Egg Noodles
By Jamie Knupp
Delicious homemade chicken noodle soup with egg noodles and vegetables.

Ingredients

- 2 cups shredded cooked chicken
- 2 large carrots, diced
- 2 stalks celery, diced
- 2 Tbs butter
- 1 large yellow onion, diced
- 1 clove garlic, minced
- 1 1/2 cup egg noodles
- 64 oz chicken stock
- 1 tsp parsley
- 1/2 tsp basil
- 1 tsp salt
- 1 tsp pepper


Directions

- In a large pot, melt butter over medium heat and add in the vegetables. Cook until just tender (about 5 minutes) and add in the minced garlic.
- Continue cooking and stirring until garlic begins to turn a light golden brown (about 3-5 minutes)
- Add chicken stock, seasonings (more or less, depending on taste), and egg noodles
- Bring to a boil and then reduce heat back to medium/medium-low and allow to simmer for 15 minutes.
- Add cooked chicken right before serving.

Do your little ones have a favorite "remedy" when they aren't feeling well?

Easy Homemade Low-Bean Chili


I've never really been a fan of thick chunky chili. Ok, let's be honest: I'm almost as picky with textures in food as my kids are. I love the taste of chili but kind of avoid beans at all costs. There's just something about the dry weird texture to them that I never could get over. 

My fiance, on the other hand, loves chili and beans and all southern foods. I compromised on this dish, a low-bean chili recipe that is probably a little closer to a hearty soup than chunky chili. I made it back in December for a family gathering (my son's birthday) and it was a huge hit. I was a little surprised that everyone loved it so much, considering that it really isn't your traditional chili. It is packed with flavor, though, and great for cold evenings.

The trick to making this chili is to add the ingredients in a specific order, otherwise, you'll end up with a watered down chili-flavored bean soup. Not recommended!

First, I dice up a medium yellow onion and toss it into a big pot over medium-high heat. Once they start sweating a little bit, I throw in a pound of ground chuck. I brown the beef, stirring often with the onions, and then drain off the grease. 

Before adding the meat/onion mixture back into the pot, though, I dump in a can of fire-roasted tomatoes and the chili seasoning. I let that simmer for 2-3 minutes, then add in the meat mixture. That has to reduce down a little bit, to give the meat the smoky tomato and chili flavoring, and then I add a can of tomato sauce, two cans of chili beans (in chili sauce) and one can of drained & rinsed dark red kidney beans. I also add in 1/2 cup of water at this point and mix it all together before reducing the heat and letting it slowly simmer for about 15-20 minutes.

You're probably wondering how I eat chili without eating beans, aren't you? Even Matt looks at me weird when I get a bowl! I usually use a ladle to scoop up meat, onions, tomatoes, and lots of sauce/broth while leaving the beans behind in the pot - then add lots of sour cream and cheese and use it as a cracker dip. Probably one of my favorite foods of all times. And yes, I know I'm a little odd - but you can't knock it until you try it!

Easy Homemade Chili Recipe


Easy Homemade Chili Recipe
A low-bean chili packed with lots of flavor
Ingredients
- 1 Medium yellow onion, diced
- 1 lb ground beef
- 1 can fire-roasted tomatoes
- 1 can tomato sauce
- 2 cans chili beans (pintos) in chili sauce
- 1 can dark red kidney beans, drained and rinsed
- 1/2 cup water
- 2 Tbs Chili Seasoning (You can use a packet, but I prefer this recipe)

Directions
- In a large pot over medium-high heat, add diced onions and begin to sweat them. Add ground beef and brown. Drain and set aside.
- Pour in fire-roasted tomatoes with juice into pot and add your chili seasoning. Let simmer/reduce for 2-3 minutes before adding the meat/onion mixture back in.
- Reduce heat to medium and add in remaining ingredients, stirring to combine well.
- Cover and simmer for 15-20 minutes, stirring occasionally.

*Notes: Best served with sour cream, shredded cheddar, and thinly sliced green onion, although the cave man puts mayo in his. (He told me to tell you guys it's awesome, if you like that kind of thing)

Am I alone? Who else here doesn't like chili with a lot of beans?

Tropical Angel Food Cake

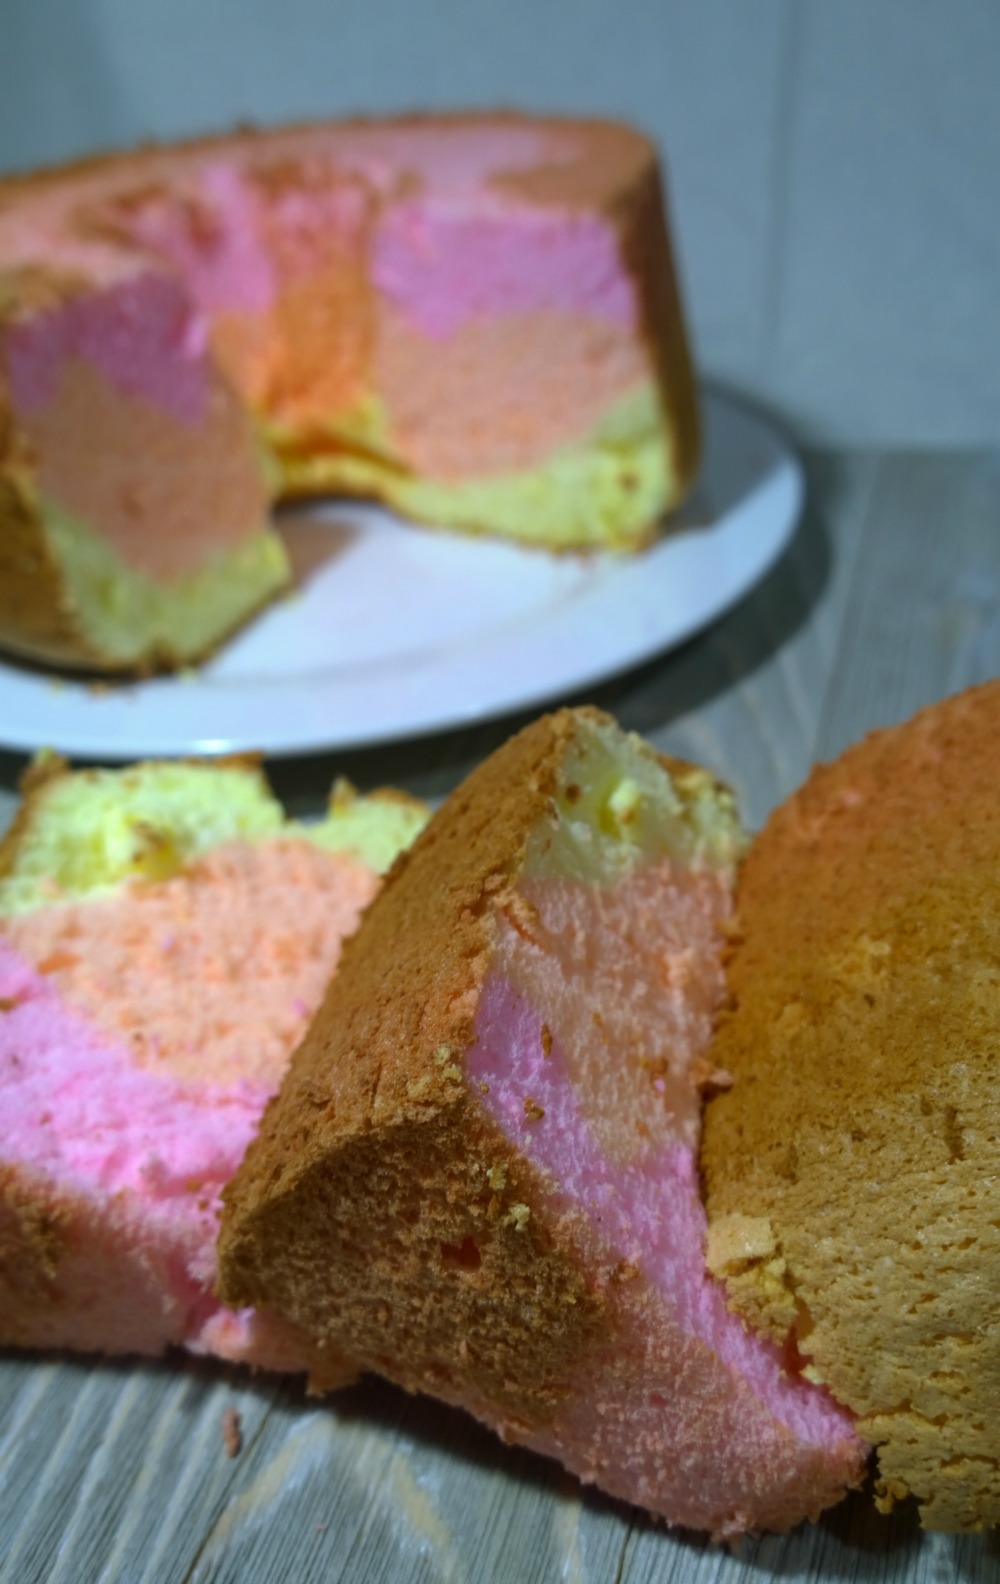
Layered Angel Food Cake with Tropical Flavors and Colors

This past weekend, Matt got called away to do an out-of-town job so it was just me and the kiddos. Silly me had the bright idea to invite over my niece as well (she's the same age as my stepdaughter) and just have one big playdate weekend with all the little guys. She's a really good kid, and can usually do a good job keeping the other three semi-calm. That worked for a couple of hours until everyone started whining that they were bored and that we didn't have anything to do at my house.

My solution? Let's bake a cake! Of course, when I started throwing out ideas of what kind of cake to make, I kept getting a lot of "meh" and "We want to make something fun!"

I threw on my thinking cap, and decided that an angel food cake is a time-consuming cake that would keep them busy for a while... but I'd never done anything besides plain angel food. The girls wanted to make something pretty, my little man wanted something sweet, so we went tropical. After it was done, they named it the Tropical Sunset Angel Food Cake.


This cake was so delicious. It was light and fluffy and the flavors blended so well. It didn't even need a frosting, but if you were inclined to put something on it, I would recommend just a light powdered sugar dusting or maybe a thin glaze. 

It also looks best when cut, the colors are so pretty that it overpowers the kind of bland look of an uncut angel food cake. 

You're probably dying to see how I made this right? Well, the trick was to gently fold the colors and flavors in, after the cake mix was completely done. If you've never made an angel food cake before, it's important to achieve a stiff peak with your egg whites in order to get the rise and fluff that makes an angel food cake stand out. 


Tropical Angel Food Cake


Tropical Angel Food Cake
By
A light and fluffy angel food cake with subtle tropical flavors and gorgeous vivid colors.


Ingredients

- 12 Egg Whites, room temperature
- 1 1/2 cups Powdered Sugar
- 1 cup Cake Flour, sifted
- 1/3 cup Warm Water
- 1 1/2 teaspoons Cream of Tartar
- 1/4 teaspoon Salt
- 1/4 teaspoon orange extract
- 1/4 teaspoon almond extract
- 1/4 teaspoon coconut extract
- 2 gel food colorings (I used red and yellow)


Directions
Preheat oven to 350°F

Using a stand mixer, combine egg whites with water, cream of tartar, and almond extract on low for about 2 minutes or until starting to foam. Gradually add in 1/2 cup of powdered sugar. Increase speed to high and mix until stiff peaks form.

In a separate bowl, sift together cake flour, salt and remaining cup of powdered sugar. Gently fold into stiff egg whites.

Separate the mixture into three smaller bowls and add in small amounts of the gel food coloring until you achieve your desired colors. Once you have the colors, add the orange extract into one and the coconut extract into the other. Leave one almond flavored.

Carefully layer the three colors into an ungreased tube pan. Bake for 35-40 minutes. Cake is done when cracks on top of cake appear dry and a wooden skewer inserted halfway between tube and pan comes out clean.

Cook upside down using a wine bottle or cooling rack.

Notes: Be sure that all utensils and bowls are completely clean of any oils or grease or cake will not rise. Metal bowls and rubber spatulas are the tools I've found to work best for angel food cake.

Best Homemade Buttermilk Biscuit Recipe

I'm from the South, where the quality of your homemade biscuits is a sign of character. It's not enough to simply crack open a roll of refrigerated dough and toss it into a pan - Southern biscuits have to be made with love. And buttermilk.


The best biscuits are soft inside, with a distinct buttery flavor and that little bit of buttermilk tang to them. They can't be crumbly or flaky - that style just doesn't work well with sausage gravy poured on top or as a sausage biscuit with grape jelly.

Over the last couple of months, I have tested out every single biscuit recipe I could find. I asked my mom how she makes hers, I tried following the recipe that my mother-in-law makes... I even tried my stepdad's Granny's recipe. No luck. I came close a few times but never could make that perfect fluffy soft biscuit that I wanted.

That's when I decided to take matters into my own hands. The basic biscuit recipe always calls for flour, butter, and milk. There are all kinds of different variations - self-rising flour vs. all-purpose with baking powder and salt, butter vs. margarine vs. shortening vs. lard, whole milk vs. buttermilk... Every method was tried and tested and tweaked until I came up with this one: My Perfect Biscuit Recipe.

Only problem? No buttermilk. I tried different variations of the acid in milk, trying different kinds of vinegar and citrus juices, but I found that approximately one tablespoon of lemon juice in a cup of whole milk works best. Just remember to let it sit for about 5 minutes before adding it to the flour and butter mixture.

Now the trick is to make sure you don't overwork the dough. It has to stay sticky and wet, so be sure to add a little extra flour as you fold and (gently) knead the dough.


Traditionally, you would use a round biscuit or cookie cutter to get the perfect size/shape for these. I had neither, so I used a glass cup with a little extra flour around the rim. This made larger than normal biscuits, but no one complained!


Bake them until they're just golden brown on top. You can add a little bit of butter here to make them even tastier.


Yield: 8 Biscuits         Author: Jamie Knupp

Perfect Buttermilk Biscuits

prep time: 10 MINS    cook time: 10 MINS    total time: 20 mins
Light, fluffy homemade buttermilk biscuits that are simple to make and taste amazing every time.

INGREDIENTS:


  • 2 Cups Self-Rising Flour (I use White Lily)
  • 6 Tablespoons Butter - cut into small cubes (Very cold)
  • 3/4 Cups Whole Milk
  • 1 Tablespoon fresh lemon juice
  • Extra flour for kneading

INSTRUCTIONS:


  1. Combine milk and lemon juice in a small bowl and allow to sit for 5 minutes.
  2. Sift flour into large bowl and cut in butter cubes until they are about the size of peas. Use whisk or pastry blender, not hands. Heat from your hands will melt the butter.
  3. Slowly add the milk, and gently mix only until all ingredients are combined.
  4. Turn dough out onto a floured surface. The dough will be VERY sticky.
  5. Lightly dust surface of dough with flour and gently knead, folding the dough and pressing down 4-5 times, dusting with more flour if it gets too sticky.
  6. Cut out biscuit rounds using a cookie cutter or floured cup. Place on baking sheet with edges touching.
  7. Bake 8-10 minutes at 400°F
Homemade fluffy buttermilk biscuits - southern style


Homemade Kettle Corn

When I was a kid, my dad would take me to the Grundy County Fair every summer. It was a small town festival, but full of fun rides, good music, and all the delicious fair food you could eat. My favorite treat of all was the old-fashioned kettle corn popcorn made right in one of those food carts and sold by the bagful. 

It's one of those tastes that can't be replicated by microwave popcorn or flavored powders... but I'm pretty sure I've mastered the flavor right on my stovetop.

My kids love it, and it's the perfect alternative to the snack cakes that they want to eat. I love popping up some of this homemade kettle corn anytime I'm craving something sweet because it's a lot better for me than junk food. The best part is that it only takes about five minutes to make, and the recipe can be doubled or even tripled to make a tasty snack for the whole family!


Homemade Kettle Corn


        Homemade Kettle Corn

Delicious stove-popped popcorn with a sweet addition.
Ingredients
- 1/4 Cup Popcorn Kernels
- 2 Tablespoons Popping Oil or Vegetable Oil
- 2 Tablespoons Granulated Sugar
- 1 Teaspoon Salt
Total time: 5 minutes
Yield: 5 cups (5 servings)
Directions
Heat oil in heavy pot with 3 kernels. Once those kernels pop, add in the rest of the kernels and secure lid tightly. Shake pot often, and carefully add sugar when half of kernels are popped. Replace lid and continue popping until all kernels are popped. Remove from heat right away and pour into bowl. Sprinkle with salt and shake bowl or mix to prevent clumping.

Manwich Monday: Easiest Supper Ever + Sloppy Joe Totcho Recipe

This is a sponsored post written by me on behalf of Manwich. All opinions are 100% mine.


Mondays are always so hectic around here. Two kids come home from school grumpy and tired, there's homework to be done and a house to straighten up... The last thing on my mind is making some elaborate dinner that no one is going to eat anyway.

That's why I've replaced our "What's for supper tonight?" with Manwich Monday (and occasionally Sloppy Joe Saturday, depending on how busy the weekend is.)


Maybe it's a sneaky mom trick, but when I make Sloppy Joes, I know they take two hands to eat. That means no one is going to be checking their phones or playing with their tablets once supper starts. Manwich is the best way to go for getting everyone to the table for a simple family supper.

I used to love when my mom would make Sloppy Joes for supper. It wasn't anything special that she did to them, just a plain ol' hamburger bun with saucy ground beef. She always used Manwich though, and the sweet and tangy sauce made them the perfect supper, especially when she paired them with tater tots!

That's why I want to share my family's new favorite recipe - Sloppy Joe Totchos! They're great on their own as a snack or as a side to Sloppy Joes.

Sloppy Joe Totchos

Sloppy Joe Totchos

Ingredients
  • 1 lb ground beef
  • 1 can (16oz) Manwich Original Sauce
  • 1 bag frozen tater tots
  • 2 cups shredded cheddar cheese
Cooking Directions
  1. Fry or bake your tater tots.
  2. Brown ground beef, drain, and add Manwich sauce.
  3. While tots are still hot, cover with cheddar cheese, and then add meat mixture.
  4. Enjoy!

The best part? Manwich comes in three different varieties: Manwich Original, Manwich Bold and Manwich Thick & Chunky - no meat sauces perfect for sandwiches, pastas, and more.

Visit manwich.com to learn more about Manwich products, recipes and more and be sure to follow them on Twitter (@Manwich) for more great recipe ideas!
Visit Sponsors Site

Easiest Chicken Fried Rice Recipe

I received this item for the purposes of making my Chicken Fried Rice Recipe and for sharing my honest experiences with you. All opinions are my own.

I love rice. Unfortunately, I can't make rice to save my life. I mean, sure, I can whip up some Minute Rice as a side dish, but only if you don't mind a burnt layer stuck to the bottom of the pan...

Seriously, I gave up on making rice years ago. It's one of my favorite breakfasts, to make a bowl of fluffy white rice with a little bit of butter and sugar... yum! The frustration of making either crunchy rice or burned rice, though? Not even worth the hassle.

If your rice resembles cement more than something edible, you've gotta check out this new addition to my kitchen. It's the 4-20 Cup Rice and Hot Cereal Cooker from Hamilton Beach, and this thing totally cuts out the aggravation of trying to make a perfect bowl of rice.


I love this rice cooker because it can be used for so much more than just rice. I've used mine for hot cereals like oatmeal (add in some apples and cinnamon and your kids will go crazy for it) as well as steaming broccoli and carrots. It's definitely one of those things that I didn't realize I needed it until I had one.

It's so easy to use. The steamer basket doubles as a strainer to rinse your rice, and the measuring cup makes sure that your portions are perfect and exact every time. If I want to make 3 cups of rice, I just measure out 3 level cups with the measuring cup provided, rinse it, and then pour it into the pot and add water up to the 3 line. No more guessing portions or trying to make sure I remember the 50/50 ratio with rice to water.

It's a completely no-hassle system; All you have to do is close the lid, turn it on, and select the type of rice. There's even a delay button if you decide that you aren't ready to make the rice just yet. It took 45 minutes for fluffy, perfect white rice.


After trying out several different meals with my new Hamilton Beach Rice and Hot Cereal Cooker, my family's absolute favorite turned out to be this easy Chicken Fried Rice recipe:


Now, you're going to want old rice for this recipe. Leftover, straight from the fridge rice works best, cold.

Ingredients:
1 cups cooked, diced chicken breast
3 cups cooked rice (day old rice works best)
1 bag frozen vegetable blend (corn, carrots, and peas)
1 yellow onion, diced
1 clove garlic, minced
2 Tbs Soy sauce
1 Tbs Vegetable Oil
1 egg
seasoning (I love the Sun-Bird Fried Rice Seasoning packets, but plain ol' salt & pepper works wonders too)

Start by heating your oil in the pan. Toss in your onion and garlic and cook on med-high heat until garlic is golden brown and the onions are becoming translucent. Add in your frozen veggies and stir, cooking about 5 minutes (or until the vegetables begin softening). Add in your rice, soy sauce, and seasonings, and continue mixing for 2-3 minutes. Move rice to the side and scramble egg, then mix into rice. Add chicken and enjoy!

Click here to learn more, and to get your own 4-20 Cup Rice and Hot Cereal Cooker.

What's your favorite rice recipe? Comment below and let me know!

Grilled Summer Fruit Kebabs

This sponsored post contains affiliate links.
Use code MP203 for $20 off a Master Pan

What do you get when you mix summer heat, a sweet tooth, and mom guilt? Grilled Summer Fruit Kebabs! Keep reading to see how we came up with the recipe and learn all about a nifty new kitchen gadget that makes life so much easier.


I've been extremely irritable lately. I don't know if it's because it's summer and I have both little guys home and underfoot all day long, or if it's trying to take care of everything myself since the hubby is working out of town. Maybe it's a combination of everything, plus the heat. Whatever the cause - I find myself yelling more and just stressed out all the time. 

I know it's been rough on the kids - what with the extra time spent indoors and the boredom. Add in a mom who's on the verge of a meltdown, and a dash of missing their daddy... They needed some kind of special treat to help make up for it.

So today we went to the grocery store and I let them help me come up with an idea for a special dessert to make tonight. Kaya, my fruit-lover, picked out some strawberries and pineapples, while Sammy, the little man after my own heart, decided we needed something with cake. So what do you get when you put together summer fruits, pound cake, and weather too hot to turn the oven on? Grilled Fruit Kebabs, of course!

I had the opportunity to work with Master Pan recently, so I figured this would be the perfect chance to try it out. I mentioned that Matt is working out of town, right? He's the grill master, so I wouldn't even attempt to go out there and light the burners without him to supervise. The kitchen is my domain!


Usually, I'm not one for fad kitchen gadgets. So many of them are "unitaskers" (stolen from Alton Brown, my chef idol) and they're only good for one thing in the kitchen. I was a little worried about that with the Master Pan, but when I whipped it out of the box I realized the endless possibilities with this pan.

Seriously - as a mom with three picky eaters, I can sometimes make up to three different meals at supper time. Do you know how many pans that dirties up?! I can totally see myself using this pan to make chicken strips for Lexi, a grilled cheese for Sammy and Kaya, and then veggies to help balance the meals out a little. 

Katie over at You Brew My Tea uses hers for Homemade Fajitas and her marinade recipe sounds delicious - I can totally see us using our Master Pan for these too! Making breakfast would be so much easier; being able to cook bacon and sausage at once while making scrambled eggs for the kiddos and Matt's over-easy at the same time. Or burgers, with grilled onions and peppers and mushrooms... I'm telling ya, the possibilities are endless!

Clean up with this pan is so much easier, too, with the XYLAN Plus Dual Layer Non-Stick Coating. No need for oil, and virtually no scrubbing when I'm done cooking meals. 5 pans with only one burner? I can do that now.

The Master Pan is even oven safe up to 350° for an hour, so you can go straight from stovetop to oven for melty gooey goodness!

Back to the recipe, though. These are really easy to make. I just cubed up some pineapples, strawberries, peaches, and pound cake. I love the grill marks on the cake, so I grilled them up in the center of the pan, with the fruits on the outer edges to start softening a little to bring out that delicious sweetness. 

Once the cake cubes had grill marks and was pretty much toasted, I stuck a skewer through and began building the fruit kebabs. After they were assembled, I set them back in the center for about 5 more minutes, turning once halfway through.

Now, you could certainly use your own homemade chocolate sauce, but I just used some jarred hot fudge syrup in the smallest section. It heated the chocolate up nicely without scorching or sticking, and added the extra YUM factor to the kebabs!

Be sure to pin the recipe for later, and check out the exclusive offer I get to share with you guys below!


Visit the Master Pan website to order one for your kitchen! I promise: it'll quickly become a staple on your stove, too. 
Regular Price: $69.99 
Coupon: $20.00 off – Use Code: MP203
Final Price for my readers: $49.99

Cheesy Stuffed Shells

This morning, things were so hectic. I was fighting with the three-year-old trying to get the house clean in between her whiney demands, and somehow managed to get dishes washed and a load of laundry started before 10am. 

I was able to finally sit in front of the computer after that and got a post written, scheduled, and started in on some social media scheduling when Matt called. He needed me to run across town to meet him with his headphones and lunch because he left the house in too much of a hurry this morning and forgot his bag.

So out the door, Kaya and I went. Of course, since we were already out and about I decided to swing by the grocery store and grab something for supper before we went home. Which meant a Starbucks stop for a White Chocolate Mocha, because forget bringing a toddler to the grocery store without a little bit of a Mommy-reward.

There was the dilemma, though. I had no idea what to make for supper. We wandered around for a little while until Kaya chimed in to tell me she wanted "sketti."

Eh. We have spaghetti way too often around here, so I decided I wanted to try something new.

So we agreed on cheesy stuffed shells.


This recipe is simple and makes enough to feed a family of seven with leftovers. Which is decidedly a good thing, since my niece and her fiance are staying with us right now. She's just entering her second trimester and has been craving Italian food, so leftovers are definitely a plus.


Cheesy Stuffed Shells


Prep time: 20 minutes
Cook time: 30 minutes
Total time: 50 minutes
Yield: 8 servings


Ingredients

  • 1 (16 ounce) package Jumbo Pasta Shells
  • 24 ounce container Small Curd Cottage Cheese
  • 2 cups (8 ounces) Shredded Mozzarella Cheese
  • 3/4 Cup Grated Parmesan Cheese
  • 1 (24 ounce) jar Pasta Sauce (Classico Roasted Garlic is our favorite)
  • 1 Egg (slightly beaten)
  • 1 tsp Dried Oregano
  • 1 tsp Dried Parsley
  • 1 tsp Ground Black Pepper
  • 1 lb Ground Beef

Directions

1. Cook shells according to package directions. Place in cold water to stop cooking. Drain thoroughly.
2. In a medium bowl, mix together cottage cheese, 1 1/2 cup mozzarella cheese, 1/2 cup Parmesan cheese, egg, and herbs. 
3. Stuff mixture into the shells.
4. Brown ground beef. Drain. Add sauce and herbs as desired. 
5. Spread 1/3 of meat sauce in the bottom of a 15 x 10 inch pan. Place shells open side up, and close together in pan. Spread remaining sauce over top, and sprinkle with remaining 1/4 cup Parmesan and Mozzarella cheese.
6. Bake at 350°F for 30 minutes, or until bubbly. Broil an addition 5 minutes for golden brown cheese.


Strawberry Cheesecake Cupcakes

There is nothing better than a lazy day in the kitchen, whipping up a new cupcake recipe with my neices. It's a tradition started by my mom, that she would get all the kids in the kitchen around the holidays and have us help bake. Now, whenever the baking inspiration hits, I'll call up my 15 and 19 year old neices and have them come be my official taste-testers.

The new cupcake recipe? Oh it definitely passed their scrutiny.


Strawberry Cheesecake Cupcakes.

Ohh yeah. Who could resist the taste of cheesecake, with yummy strawberry, all in cupcake form? That's my three favorite things right there, all in a neat little cupcake wrapper.

I didn't want to do a traditional cupcake. I've seen all these neat cake mix + soda recipes, so I decided to put my own spin on one, and make a two-flavored cupcake.

Here's the breakdown:


For the strawberry cake

1 Box of Strawberry Cake Mix
1/2 bottle of Cream Soda (slightly more if cake batter looks too thick)

That's it for that one. Mix it up and it's ready.


For the Cheesecake cake

1 box of white cake mix
3 eggs
1/4 cup of vegetable oil
1 cup of water
1 box of cheesecake flavored pudding

Mix that up.

Then you want to alternate the two cake mixes in your cupcake liner. I used a spoon, but piping bags would of really came in handy here. once you have the liners about half full, use a toothpick to swirl the batters together to make them pretty. Optional, but the toddler loved this part.

Pop them in the oven for 18-21 minutes, or until a toothpick comes out clean. 

These simple but delicious cupcakes are a great way to spruce up a box mix. No one will know that these amazing cupcakes came out of a box!

Seriously, you should pin this for later so you can make these, or to show them to your friends so they can make some for you. They're that good.

In the words of my nephew: "These cupcakes are the most delicious thing I have ever put in my mouth." He might've just been buttering me up so I'll go back in the kitchen and try out a few more of my recipe ideas, though...

Oh! Before I forget, I made a video as well, to show you guys how easy these things are to make. Here ya go:


How do you make boxed mixes taste even better? Comment below and let me know!

Apple Cinnamon Buttercream Whoopie Pie Recipe

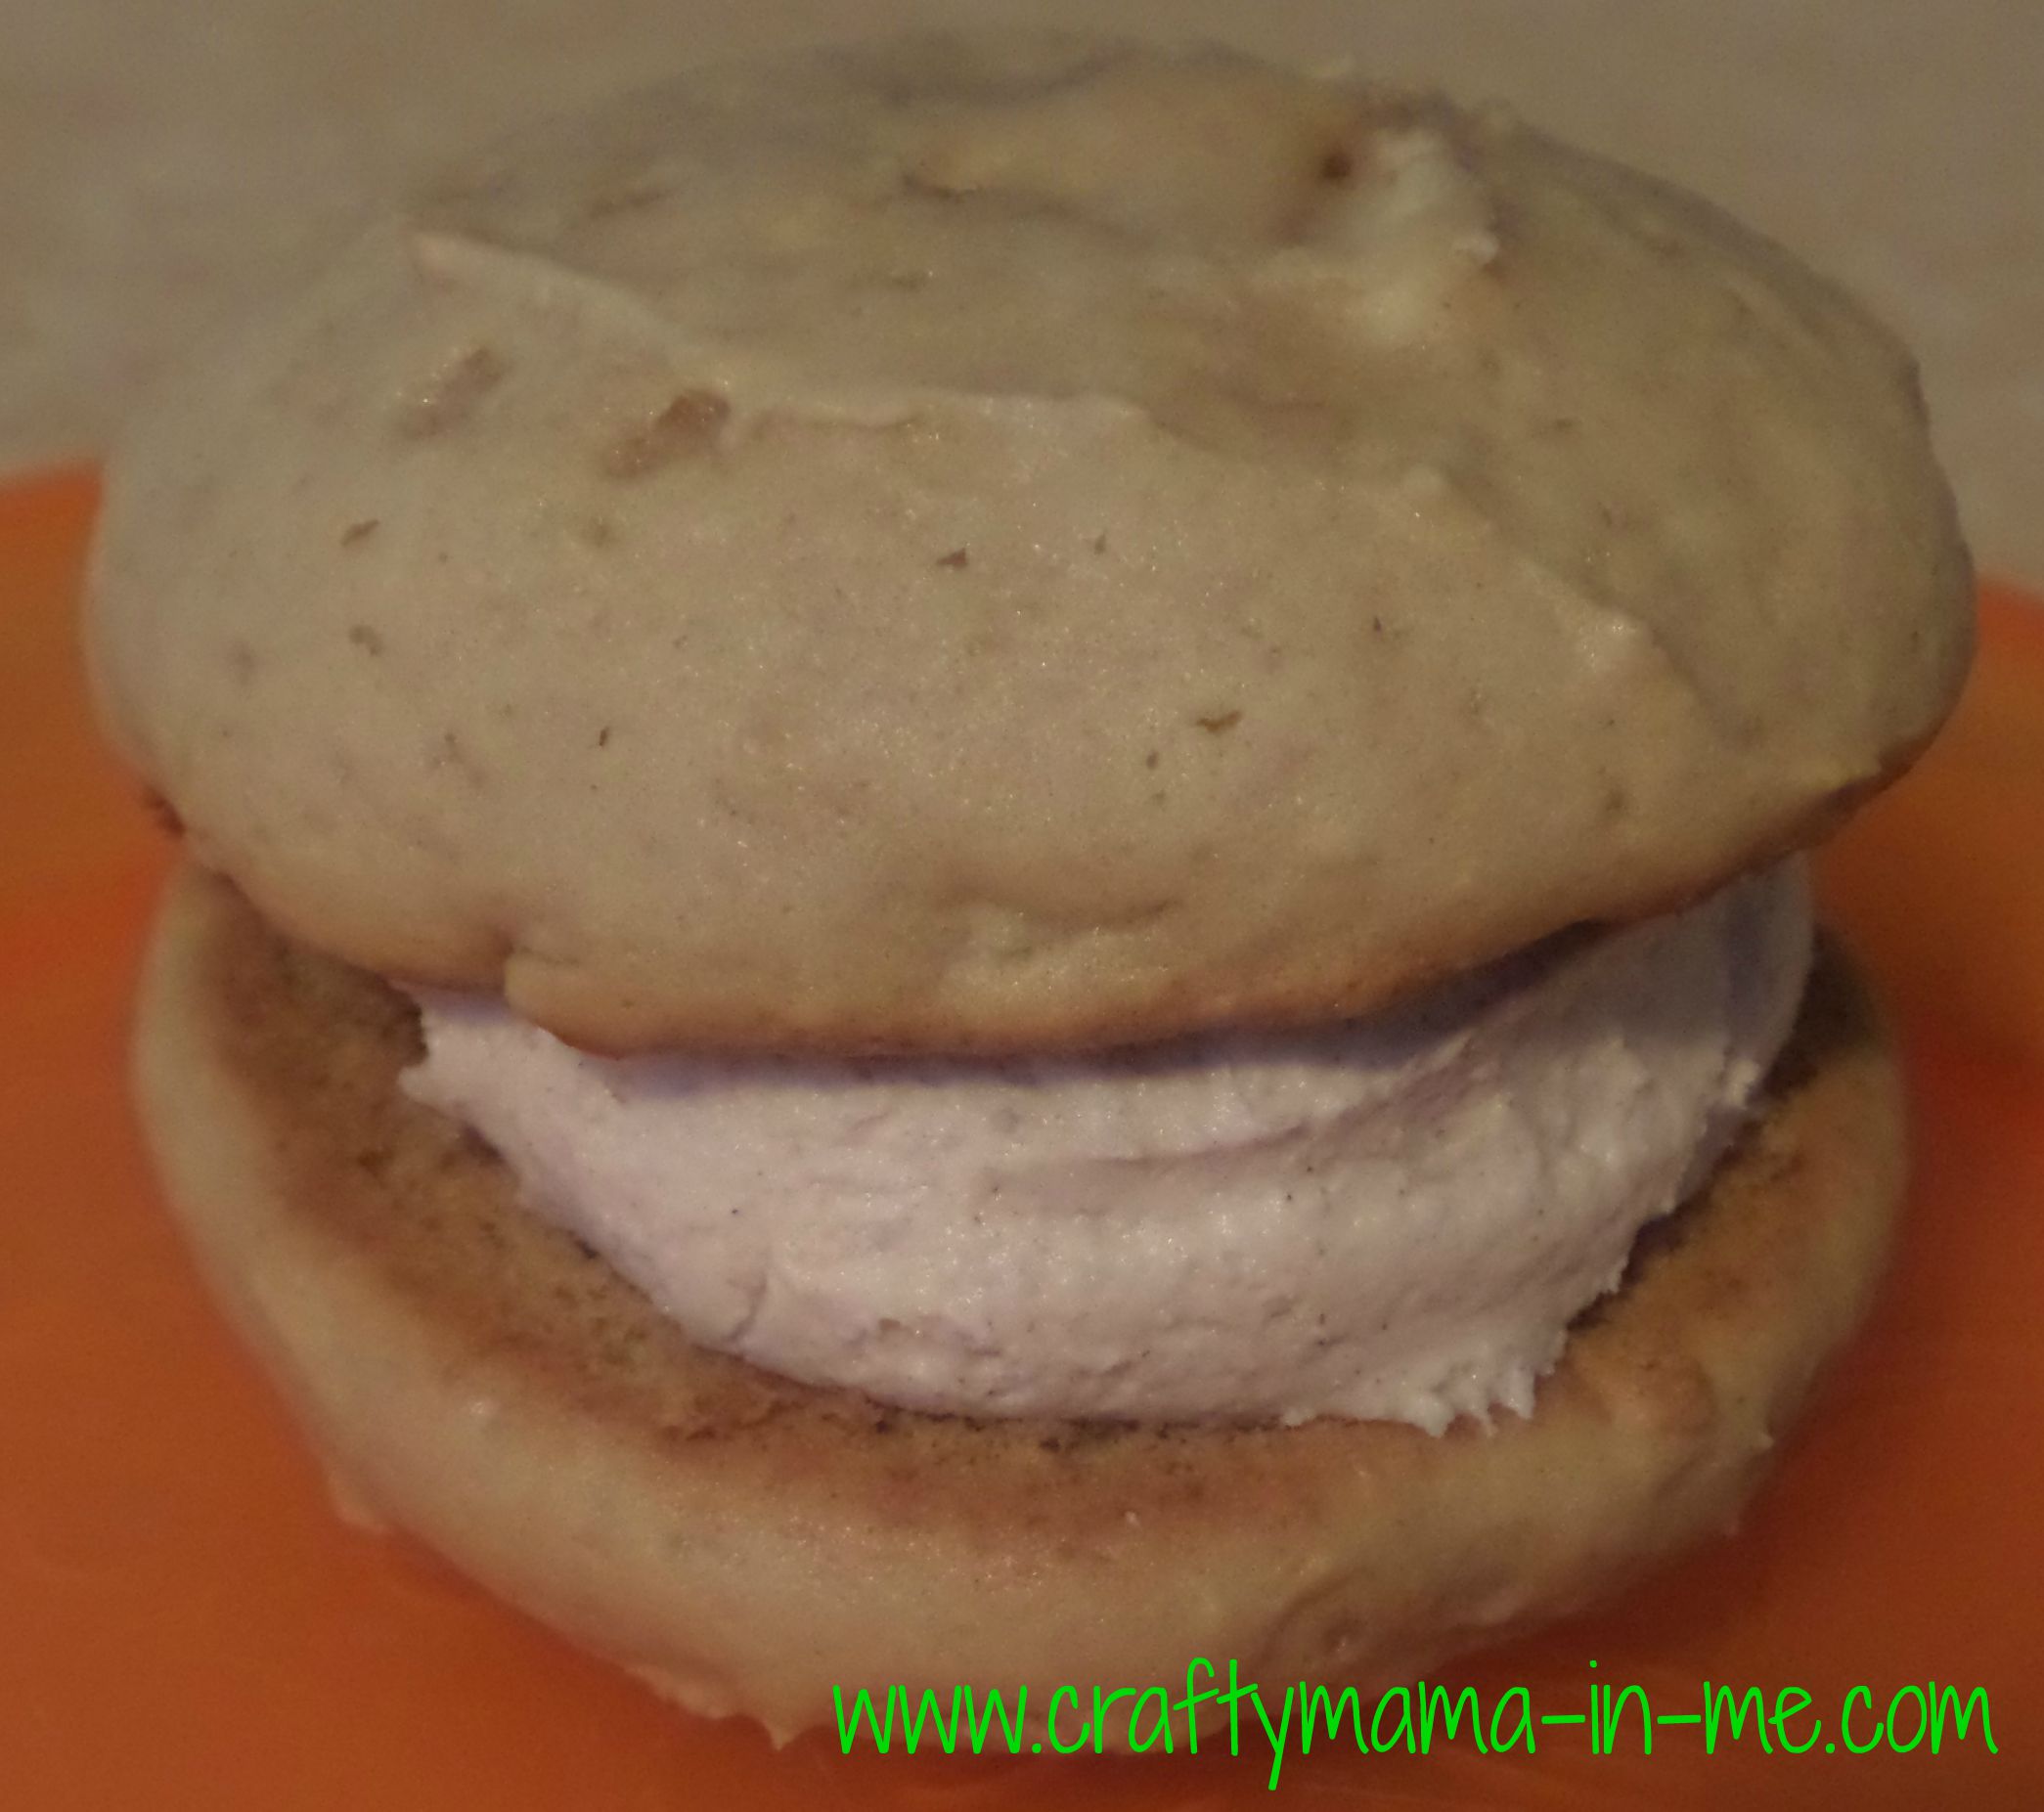
Apple Whoopie Pies with Cinnamon Buttercream Filling

Apple Whoopie Pies with Cinnamon Buttercream Filling

Since school has started my mind has shifted to fall. I love fall activities and baking. I decided that I wanted to make an apple cake and went to Pinterest as usual to look for inspiration. As I searched I didn't find anything that really spoke to me. For some reason I was in the mood for whoopie pies (the Mainer in me!) so I went in search for a recipe and didn't find anything that was "apple-y" enough. I pulled out my trusty Whoopie Pie cookbook (everyone has one of these right??) and referenced the basic vanilla recipe and the banana recipe. This lead to the creation of the of Apple Whoopie Pies with Cinnamon Buttercream Filling. The printable recipe is found at the end of the post.

Apple Cake Ingredients:

  • 2-1/4 cups flour
  • 1 tsp baking powder
  • 1 tsp baking soda
  • 1/2 tsp salt
  • 1/4 cup butter (room temperature)
  • 1/4 cup shortening
  • 1/2 cup granulated sugar
  • 1/2 cup brown sugar
  • 2 large eggs
  • 1 tsp vanilla
  • 3/4 cup applesauce
  • 1 apple diced

Directions:

  • Preheat oven to 350°
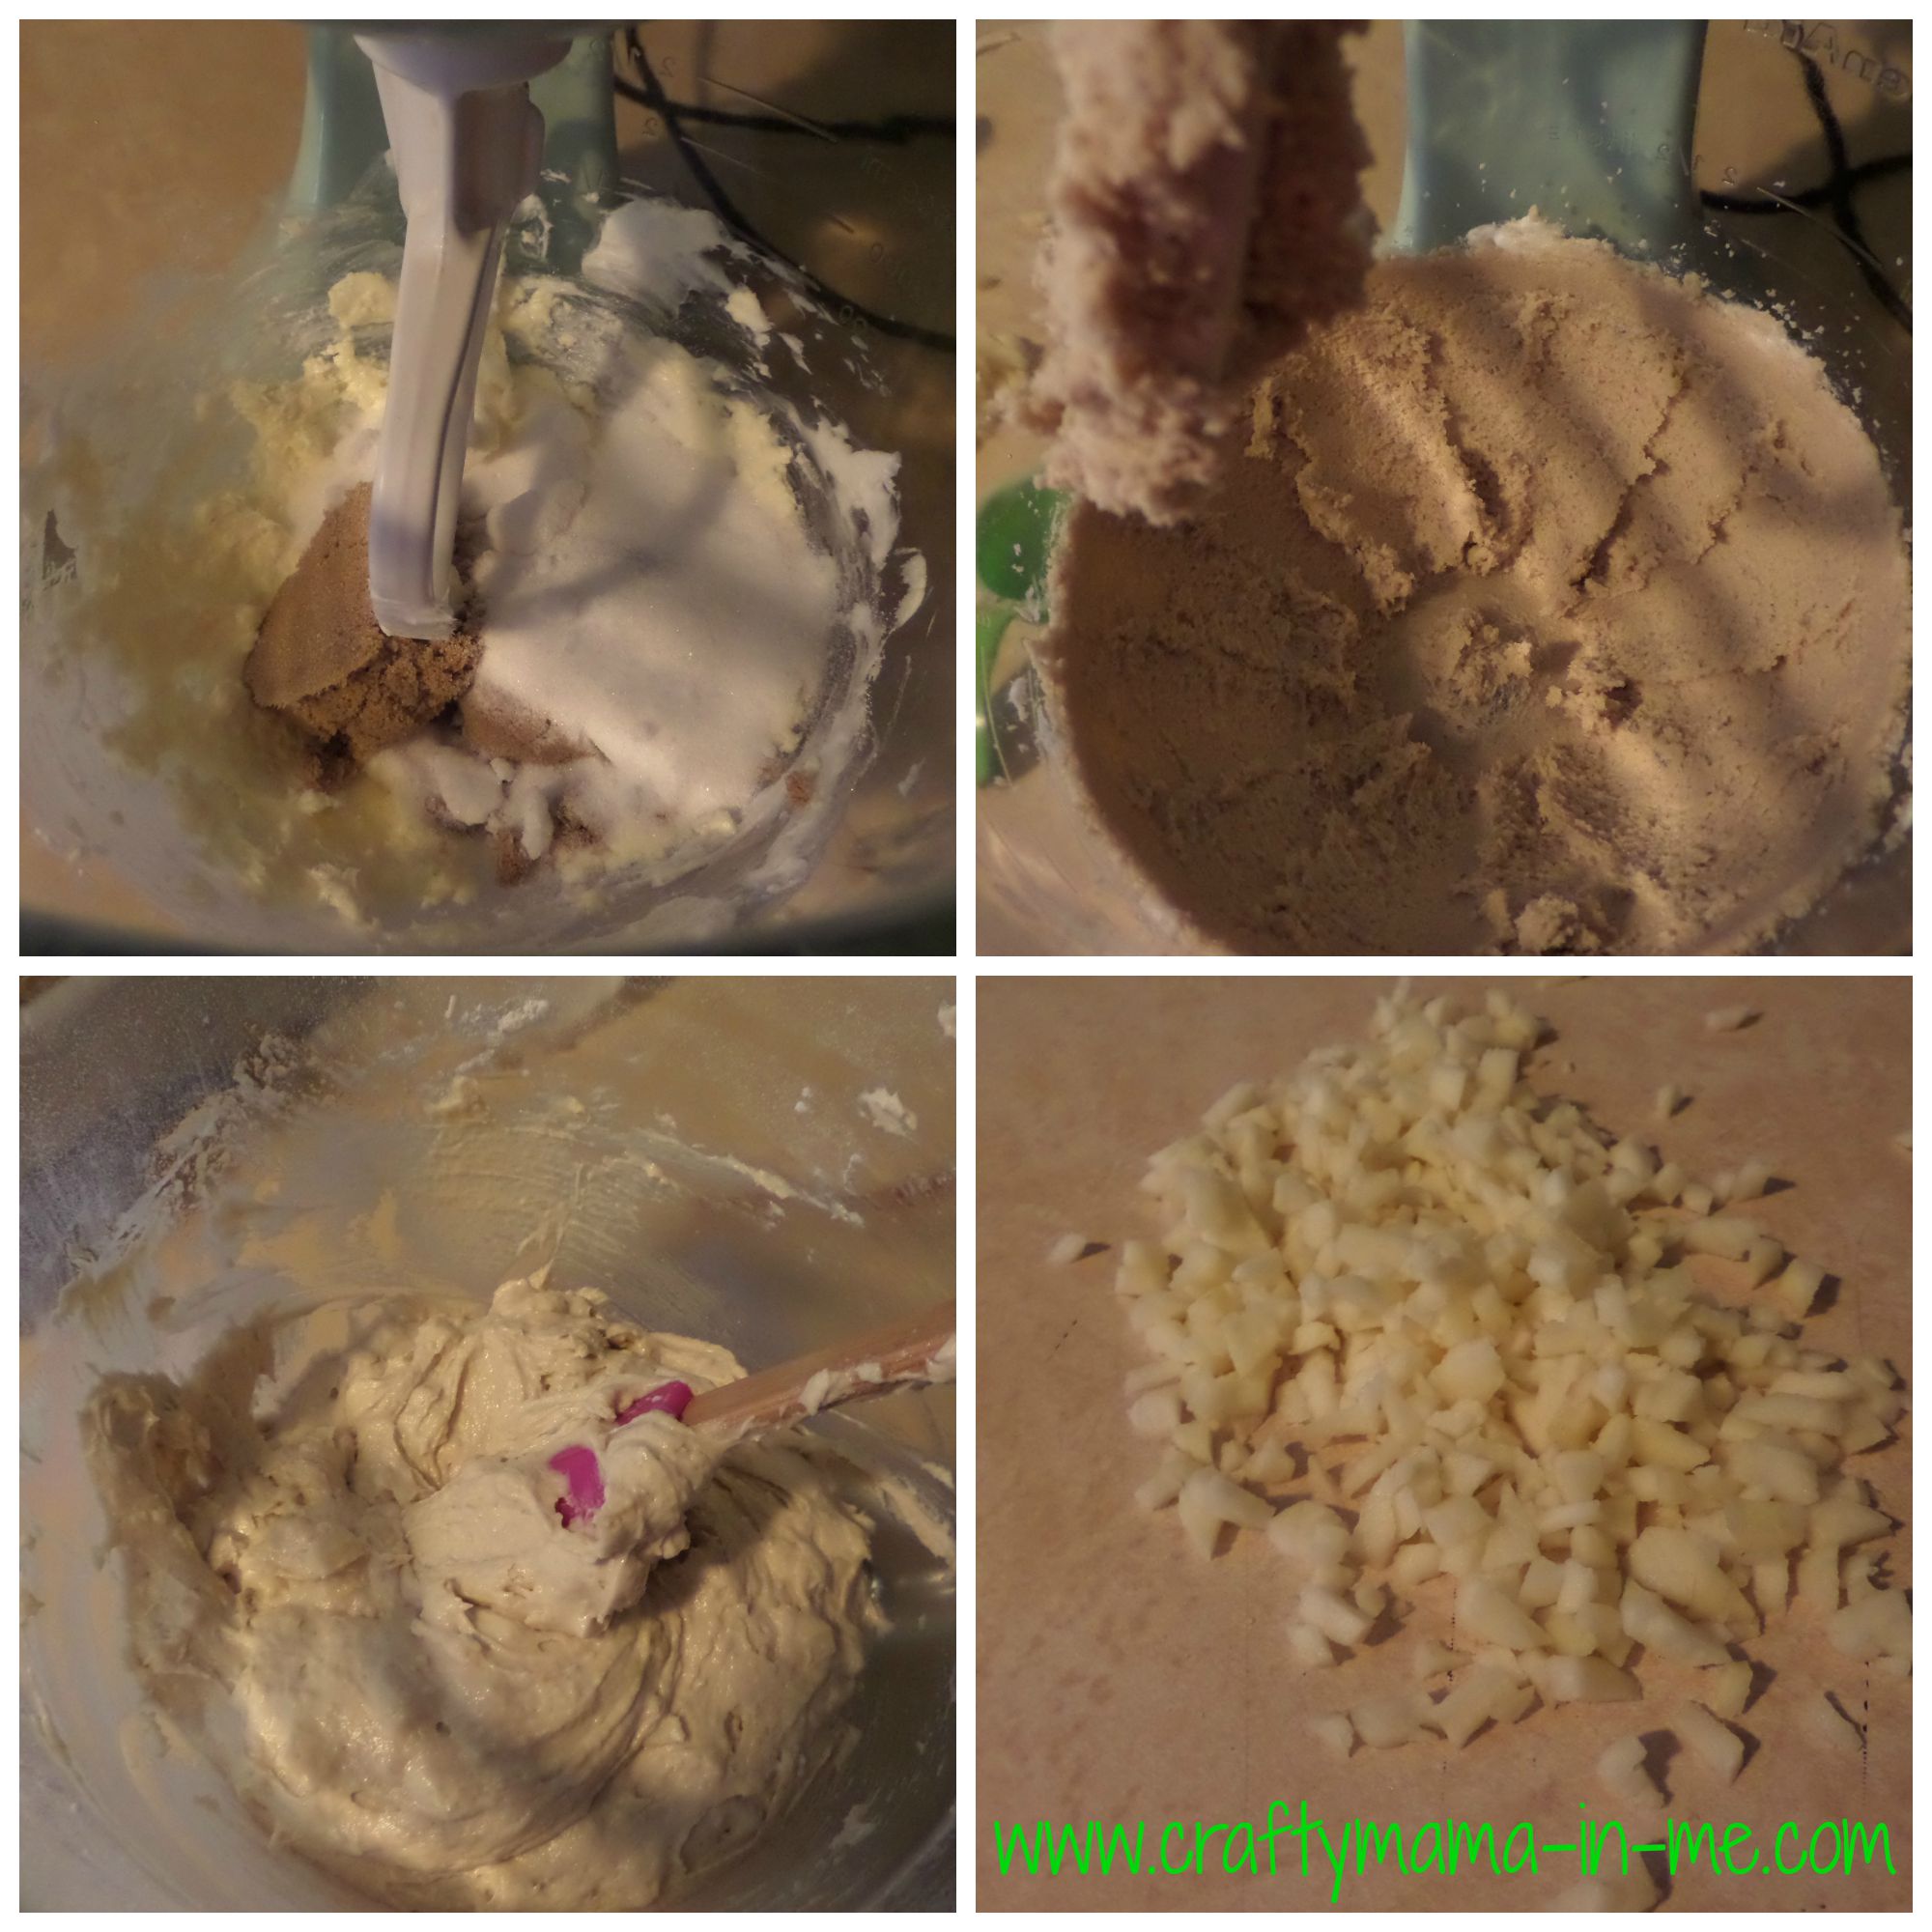
  • In stand mixer cream butter and shortening
  • Add sugars - mix on medium for 2 minutes until fluffy
  • Scrap sides of bowl
  • Add eggs and vanilla - mix on medium for 1 minute
  • Scrap sides of bowl
  • Mix flour, baking soda, baking powder , and salt in separate bowl
  • Alternately add flour mixture and apple sauce
  • Mix until fully integrated
  • Add diced apples and mix
Apple Whoopie Pies with Cinnamon Buttercream Filling
  • Using a cookie scoop place batter on cookie sheets
  • Bake 10-12 minutes or until the cake springs back when touched
  • While cakes are baking - make filling
Apple Whoopie Pies with Cinnamon Buttercream Filling

Cinnamon Buttercream Filling Ingredients:

  • 1/4 cup butter (room temperature
  • 1/4 cup shortening
  • 1/2 tsp vanilla
  • 2 cups powdered sugar
  • 1 tbs heavy whipping cream
  • 1/2 tsp cinnamon

Directions:

  • Cream butter, shortening and vanilla.
  • Slowly add the powdered sugar
  • Add the whipping cream and 1/2 tsp cinnamon on low speed - once the whipping cream is integrated increase the speed to medium and mix for two minutes until creamy

Assembly Directions:

  • When the cakes have finished baking allow to cool fully
  • Once cool flip half of the cakes upside down
  • Using a cookie scoop place one scoop of filling on the upside down cakes
  • Sandwich the filling with another cookie
  • Wrap the whoopie pies individually (otherwise they will stick together!)
Apple Whoopie Pies with Cinnamon Buttercream Filling My family enjoyed the apple whoopie pies - they turned out really yummy! I had never made cinnamon buttercream before but will definitely be making it again! Enjoy this small taste of fall!

Shannon is a stay at home mom to two children who loves to bake and enjoys planning activities for the kids.  You can find her at Crafty Mama in ME.  Be sure to follow her on Facebook for more awesome recipes! 


Peanut Butter Cookies and Memories

My love of baking came along back when I was tiny.  My oldest sister always took care of me; keeping me company when I was feeling left out because my baby brother got all of our mom's attention.  I was probably four or five years old and she would set me up on the stool and talk me through her recipes, step by step.  It was our bonding thing, baking.  Any time I'm in the kitchen, mixing flour and tasting the dough, I always think of how she would tell me stories of how her grandma used to bake with her.

Peanut butter cookies were always our favorite to make, probably because the recipe was the simplest to remember.  There's just something so sweet about the memories behind these cookies, and I love making them for my little ones when I'm feeling sentimental.

This is probably the one cookie recipe that I've never changed up, never played around with the ingredients... it's cookie love, and it should always be made the same.


Best Ever Peanut Butter Cookies

Preheat oven to 325°F.

Ingredients

  • 1 cup (2 sticks) of softened butter (or margarine)
  • 1 cup granulated sugar
  • 1 cup light brown sugar, lightly packed
  • 2 large eggs
  • 1 cup creamy peanut butter
  • 2 1/2 cups self-rising flour

Instructions

  1. Cream butter and sugars
  2. Add in vanilla and then the eggs, one at a time
  3. Mix in peanut butter
  4. Slowly mix in the flour, 1/2 cup at a time.
  5. Make dough balls about 1 inch in diameter. Roll in sugar and press into a criss-cross pattern with a fork on baking sheet.
  6. Bake for about 12 minutes, or until lightly browned.
  7. Let cool on baking sheet for a couple of minutes, then transfer to a cooling rack to cool completely.
Yield: 48


Berry Lemon Yogurt Pops

It's been unbearably hot around here lately, and trying to keep the kids cool while still making sure they're eating healthier can be somewhat of a challenge.  That's why I'm happy to be working with Yoplait® to share with you one of my favorite wholesome summer snacks!


By using Yoplait® yogurt, you get a creamy consistency, so you'll have a rich mouthful without the guilt of a heavy (and fattening) cream!  

These are so simple to make too.   Just grab a carton of Yoplait® Original Strawberry yogurt, mix in some lemon juice and zest, and spoon into your popsicle molds.  The hardest part about this quick and easy summer snack is waiting for it to freeze!

These are so simple to make that my littlest one jumped right in and started doing it herself!  

Berry Lemon Yogurt Pops

yields 1 popsicle

Ingredients

  • 1 container of Yoplait Stawberry Original Yogurt
  • 1/4 cup fresh squeezed lemon juice
  • 2 Tablespoons lemon zest

Instructions

  1. Combine yogurt, lemon juice, and lemon zest in a bowl
  2. Place mixture into popsicle molds
  3. Freeze for 4-6 hours
  4. Enjoy!

This is a sponsored conversation written by me on behalf of Yoplait®. The opinions and text are all mine.